Accordion Menu

Recent Post

Total Pageviews

Contact Us

Name

Email *

Message *

Powered by Blogger.

Pages - Menu

Popular Posts

Games & Multimedia

SCIENCE & TECHNOLOGY

Gagdet

Search Bar

Showing posts with label Guide. Show all posts

Things you Need to Know before Installing New Custom ROM on Android

Unknown     1:40 AM     0
Things you need to know before installing a new custom ROM

There is a Risk in installing a Custom ROM on Android because if you commit mistake by installing your New Custom ROM your phone will be Bricked or it will just start on the logo screen (Boot Animation)
it is because there is something wrong in installing or the ROM you have downloaded are not compatible or not for your devices that is one of the most Related Reason. 
"Fix Android Bricked First AID"


THINGS YOU SHOULD KNOW 

You need to INSTALL a Custom Recovery like (Twrp,CMW,ect)

Before installing your Custom ROM your Battery should be at 60% or Above 70% because it cause a couple of time in installing a ROM, if your phone will be powering off because of empty battery and the ROM Setup is not yet Finish the phone will only boot in Booting Animation , you need to finish intalling it first

It's Doesn't matter if your Devices is Rooted or not , you just need a Recovery mode like Twrp,Cmw to install it

If you are using Computer or Laptop to Manually install the ROM you need to Download Odin 

You don't if you are now installing you ROM you don't need Internet connection anymore 
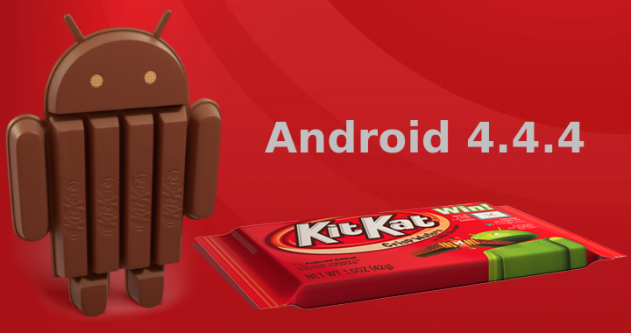
 Kitkat 4.4.4

 OR FOR LOWER RISK YOU CAN JUST UPDATE YOUR PHONE TO THE LATEST VERSION 


Top 10 Useful Application for Android 2014

Unknown     7:06 AM     0

Top 10 Useful Application for Android 2014
application android
Welcome and now i will share to you some very useful apps for your android apps
new and great apps that will shine your android and love more your android
and this is some Most popular Application

Solve the “Debug certificate expired on” error message , Android Error: Error generating final archive: Debug certificate expired on

Unknown     6:44 AM     0

long ago i tried to run my running suddenly it showed error , but i didn't find any error in my source code in java & XML also ,


The problem comes from the fact that Android required the applications to be signed even in the debug mode. So it uses a keystore file called debug.keystore to providde keys for signing applications in debug mode. This key store file has a validity period by default 365 days from its creation date.


The First Solution:


Navigate to the .android folder in your home directory “~/.android” (Linux,Mac OS)
or c:\Documents and Settings\[User Name]\.android in windows XP
or C:\Users\.android in windows Vista or Windows 7, and delete debug.keystore file.


how to find .android folder in Linux ( UBuntu ) :

click on places menu under select home folder under then click on View Menu under click on showhiddenfiles (ctrl+h) , then u can find out .Android file

Then go to eclipse clean the project, this will create a new debug.keystore file with
default validity period 365 days.

The Second Solution:


Create a new default.keystore file with custom validity period (say 1000 days).
Navigate to the .android folder.
Delete the old default.keystore file.
We will use JDK Keytool.exe to generate the new key file. It is found in C:\Program Files\Java\jre6\bin in windows or inside the Java\jre6\bin folder in Mac OS or Linux.
Open the terminal app in Mac OS or Linux or the command prompt and navigate to keytool.exe directory.
Run the following command:
keytool -genkey -keypass android -keystore debug.keystore -alias androiddebugkey -storepass android -validity 1000 -dname “CN=Android Debug,O=Android,C=US”
This will generate a new default.keystore file with validity period 1000 days.
Copy the generated file to the .android folder, go to eclipse and clean projects and it should work.
The above command has the following options:
genkey: generates a key pair.
keystore : the name of the key store file.
alias : an alias for the key store. If the alias name is more than 8 characters the first 8 only are used.
storepass : the password for the key.
validity : the validity period for the key in days.
dname : A Distinguished Name that describes who created the key. The value is used as the issuer and subject fields in the self-signed certificate.

How To Upgrade Samsung Galaxy Y 5360 To Android 2.3.6

Unknown     6:01 AM     0


How To Upgrade Samsung Galaxy Y 5360 To Android 2.3.6 
  • Step 1: Enable the USB debugging mode on your device, for enabling the USB debugging mode navigate to Settings –> Applications –> Development.
  • Step 2: Extract the DDLA1 update package which you have downloaded earlier.
  • Step 3: Turn off your device and reboot it into download mode, to do that just press the home button (middle one) along with down volume key and press the Power button.
  • Step 4: Now Run Odin3 on your local computer.
  • Step 5: Connect your Samsung Galaxy Y 5360 phone to your computer, Odin3 will automatically detect your device. Just check for the yellow ID:COM in Odin3 (which means that the drivers are successfully loaded).
  • Step 6: Later in Odin3, just load the following files (PIT  –  totoro_0623.pit, Boot Loader  –  DefaultCalDataWithBoot_S5360DDLA1_REVO5.tar.md5, PDA  –  PDA_S5360DDLA1_REVO5.tar.md5, Phone  –  MODEM__S5360DDLA1_REVO5.tar.md5 and CSC  –  GT-S5360-MULTI-CSC-ODDLA1.tar.md5) which are available in the above downloaded packages.
  • Step 7: Now under “Option” in Odin3, just check “Auto Reboot” and “F.Reset Time” and uncheck rest of the selection lists.
  • Step 8: Everything is set to proceed further, just click on Start button to initiate the upgrade process. If everything goes fine your will be successfully updated after the reboot.

Additional Steps

  • Step 9: Turn off your mobile phone and turn it on to enter into recovery mode (refer step 3).
  • Step 10: In recovery mode just select “Wipe Data/Factory Reset” and “Wipe Cache Partition” and reboot your device for cleaning up all the additional files which are loaded while upgrade.
  • Step 11: Now to confirm the update, just navigate to Settings –> About Phone –> Firmware version and notice for “Android 2.3.6 DDLA1″.
Congrats for successfully upgrading your Samsung Galaxy Y S5360 to Android 2.3.6 Gingerbread build DDLA1, do let us know if you encounter with any of the errors while upgrading we will glad to help you out with the settings to proceed further.


Update on Sony Ericsson Xperia X8

Unknown     5:53 AM     1

Update on Sony Ericsson Xperia X8
RHONZHOW.BLOGSPOT.COM


X8 have many of the same thing as the above two, but the brilliance of X8 is:
  1. X8 is cheaper than both XPERIA X10 and X10 Mini
  2. X8 is not clumsy as XPERIA X10 and have bigger screen than the X10 Mini
SE X10 Mini (Mini and Pro) has so far been huge sales successes. Sony Ericsson X8 takes everything great from both the large and small version of the XPERIA series and summarized in a mobile. 


The 3" touchscreen of the X8 Android multimedia smartphone lets you enjoy a perfect combination of entertainment and ease-of-use. Connect through 3G or Wi-Fi. Type your messages on the virtual QWERTY keyboard. Find your way with Google Maps and GPS.
The X8 media phone with touchscreen gives you high-speed Internet - and lets you have it your way. Enjoy instant access to your favorite functions via the customizable four corners of the home screen.
 
So which one should u take x8 or x10 ?


How to Prevent your Android Phone from losing or by getting Stole

Unknown     7:00 AM     0
CoIr2.jpg
How to Prevent your Phone from losing or by getting Stole

My Mother always Remind me not to leave my phone anywhere because we do not know what will happen , Recently my phone stoled from me and i dont know what to do i keep thinking all the time and i've search in Google How do i locate my phone ? and all the solution i read did not work

Now im ganna tell you Something Useful 


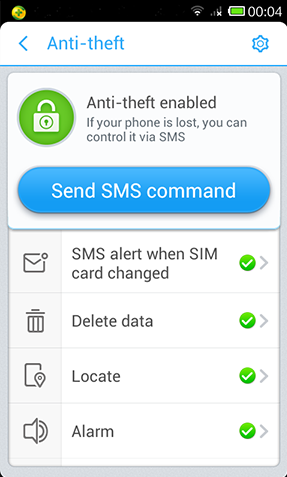
Have you ever heard a Application on android called "Security 360" 
it is a great and Useful apps allow you to locate your Android devices by Log-in in google account , and it is so easy i tried it onces "

SCREENSHOTS
s7HZF.jpg

As you can see this Screenshot this is how it look if you tried to find your phone since i dont have registered phone in my google account then it say "NO DEVICES" or no devices found


This Video show you how to Locate your phone using this "Security 360" Application


Screenshots 


How to Fix Bricked Android Devices

Unknown     10:26 PM     0

 Phone Keeps Rebooting: Wipe Your Data and Cache

How Do I Fix My Bricked Android Phone?
If you've flashed a ROM and your phone won't boot into the home screen, it's probably because you forgot to wipe your data and/or cache. It's trying to boot into the ROM, but some leftover data from your last ROM is causing it to error out, and it'll reboot itself over and over again. If your phone's eating a big bowl of boot loops, your first course of action should be to wipe its data and cache, which you can do from recovery mode. This method assumes you're using ClockworkMod Recovery, like the majority of Android users, but if your particular phone uses a different third-party recovery (like AmonRA), you should still be able to find these options in the interface. They might just be in a different place. To wipe your data and cache:
  1. Power down your phone. Turn it back on and boot into Recovery mode. This is a bit different for every phone, so you'll have to Google how to do it for your specific model. Usually it involves holding down another button, like Volume Down, as you turn your phone on. HTC phones will have to then select "Recovery" from a menu, while other phones will boot directly into ClockworkMod. You'll know you're in ClockworkMod by the words "ClockworkMod Recovery" at the top of the screen.
  2. Use your volume keys to navigate the menus, and your power button to select menu items. Scroll down to Advanced, and choose "Wipe Dalvik Cache". When that's finished, go back to the main screen and choose "Wipe Cache Partition". Lastly, head to "Wipe Data/Factory Reset". This will delete all your settings and apps, but you should still be using the correct ROM.
  3. Reboot your phone.
With any luck, it should boot right into your ROM. If that didn't work, try the below method with the same ROM (or with a different ROM) and see if you get different results.

If Your Phone Boots Straight Into Recovery: Flash a New ROM

If, when you boot up your phone, it goes straight into ClockworkMod, then there's likely an issue with the ROM you flashed. Note that some ROMs boot into recovery mode automatically after flashing, so reboot your phone once from recovery mode to make sure you're having a problem. HTC users: if you boot up your phone, it might go straight into the bootloader—check to see whether you can choose "Recovery" from the list before continuing to the next step. HTC phones usually don't boot straight into recovery.
In this case, you'll want to reflash the ROM from scratch. Try again with the ROM that messed up your phone, if you so choose, but if that doesn't work, try an entirely different ROM. The best way to do this is to download a ROM from somewhere on the net and putting it on your SD card. You'll need to take the SD card out of your phone, and you'll need an SD card reader that you can plug into your computer. Here's how it works:
  1. Plug the SD card into your computer. Drag the ROM's ZIP file to your SD card, and wait for it to copy.
  2. When it's done copying, eject the SD card and put it back in your phone. Reboot into Recovery mode. This is a bit different for every phone, so you'll have to Google how to do it for your specific model. Usually it involves holding down another button, like Volume Down, as you turn your phone on. HTC phones will have to then select "Recovery" from a menu, while other phones will boot directly into ClockworkMod. You'll know you're in ClockworkMod by the words "ClockworkMod Recovery" at the top of the screen.
  3. Use your volume keys to navigate the menus, and your power button to select menu items. Scroll down to "Install ZIP From SD Card" and navigate to the ZIP file you just copied over. Give it time to flash the ROM.
  4. When it's done, reboot your phone.
Hopefully, your phone should successfully boot into the new ROM. From there, you can probably assume that the previous ROM that messed up your phone isn't going to work, and you'll have to find another ROM for now—or find another copy of that ROM that isn't corrupted. Remember to make backups of your working ROMs so you don't lose all your data!

If Your Phone Boots Straight Into its Bootloader: Restore From a Stock ROM

If you're really having trouble, one of the most surefire ways to get your phone working again is to restore from the original ROM your phone came with—unrooted, stock, stable goodness. Each manufacturer and phone has a different method for doing this, and we can't go into too much detail here, but we can steer you in the right direction.
Note that this will unroot your phone, and return it to exactly how it was when you bought it from the store. You'll lose all your apps, settings, ClockworkMod recovery, you'll get over-the-air updates again, and you'll even have to re-activate your phone if you're on a CDMA provider like Verizon or Sprint.

Android Rooting Terms You Should Know

Unknown     8:24 PM     0


Android Rooting Terms You should Know

Before we get started, I would like to explain a few terms because the terminology can get complicated and confusing. This will help you to understand other device specific guides. I’ll try to keep it short and not go into (technical) details.
BootLoader
The Bootloader is your phone’s software foundation. It’s basically what runs before your operating system starts (like a PC’s BIOS). As many manufactures don’t want you to modify your phone’s OS, it needs to be unlocked before you are able to root your phone or install custom ROMs (explained later).
Brick
This is something you don’t want to happen to your Android device. Like the name already implies, a bricked phone (or tablet) can only be used as a paperweight or nice decoration for your apartment. Bricked devices are irreversibly damaged and won’t work anymore. This can, for instance, happen if damaged ROMs are installed or wrong firmwares are flashed. Always make sure to read instructions and verify checksums (a set of numbers that identify the file) to make sure nothing goes wrong. If you’re lucky and your device is only soft-bricked, meaning that it does not boot but still turns on, 
BusyBox
Android, being based on Linux/Unix, offers a limited amount of UNIX commands (which most users won’t need anyways). BusyBox will implement more commands that are necessary for some root apps to work properly.
Custom ROM
A custom ROM is a modified version of the Android operating system. Tweaks, additional features, different themes or an enhanced performance are usually included. Custom ROMs also offer the possibility to use a newer, unreleased, version of Android on your phone that might usually not be available for your device because of restrictions from manufacturer or providers.
Fast Boot

Fastboot is a diagnostic- and engineering tool which offers you several features such as launching in recovery mode or flashing image files.
Kernel
The kernel is the brain of your phone that controls how the system and hardware interact. It’s basically the lowest level of your operating system that manages memory and hardware.

Recovery Mode

Recovery mode offers you the possibility to perform system-level tasks (like formatting, defragmenting, etc.), backing-up your devices or install custom ROMs. Android offers a limited stock recovery function. More sophisticated recoveries like ClockworkMod Recovery, 4EXT Recovery and TWRP Recovery offer additional features and are easier to use.

Root

Rooting will give you full administrator access of your device. It might also void your warranty (depending on the device and your place of residence), so make sure to handle your device with care after rooting it. You are always able to revert this process by simply flashing a stock-ROM (the original ROM installed by your phone’s manufacturer). Doing this will also “restore” your warranty.

S-OFF

S-OFF means that the NAND partition of your Android device is unlocked. This mostly applies to HTC phones.

Superuser

Rooting your phone will create a new “account” with complete administrative permissions. This superuser account is used by some apps and functions.

© 2014 RhonzHow. Designed by Bloggertheme9. Powered by Blogger.